Mary Parrish
In-Home Rock Climbing & Bouldering Wall
2020 / A personal engineering project
My Responsibilities:
Mechanical Engineering, Building, Interior Design, Project Planning, Rock Climbing
Scope:
4 Months
My Tools:
SolidWorks CAD, Hand and Power Tools
Overview
At the start of the Covid-19 pandemic, my rock climbing career was at its peak. Climbing outside was relatively safe as long as we were social distancing; however, when the cold weather hit, I had to get creative. I decided to build a bouldering wall in my basement. This required some project planning, design, and hands on building. I love a good house DIY project, and it’s even better if it’s for a fun activity.
The Design
I had a pretty big nook in my basement that seemed perfect for a two wall, semi-enclosed space. In my at-home rock climbing training research, I found that it’s most effective to have the following inclines:
- No Incline (0 degrees): Standing perpendicular to the floor, this type of wall can be used to practice more difficult balancing techniques without having to overuse your grip strength. This is good for some beginner moves, but there is still plenty of room to increase the difficulty on a straight wall.
- Slight Incline (15 – 30 degrees): Slightly negatively inclined, this type of wall helps you build up grip strength while simultaneously getting more confident in balance-y moves. This is what the majority of your outdoor experience will feel like at the intermediate level.
- Big Incline (30 – 45 degrees): Aggressively negatively inclined, this type of wall will push any expert to increase grip strength and improve more difficult climbing techniques.
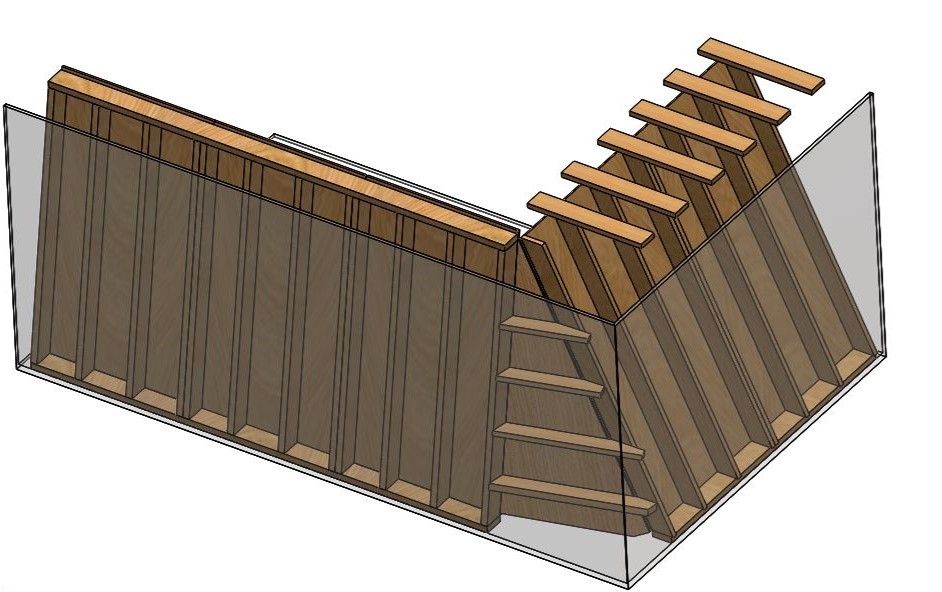
I initially didn’t feel I needed to build a straight wall (though I am in the beginner — intermediate level of my climbing career). So, in my initial sketches, I laid out some options for a 15 degree incline and a 35 degree incline.
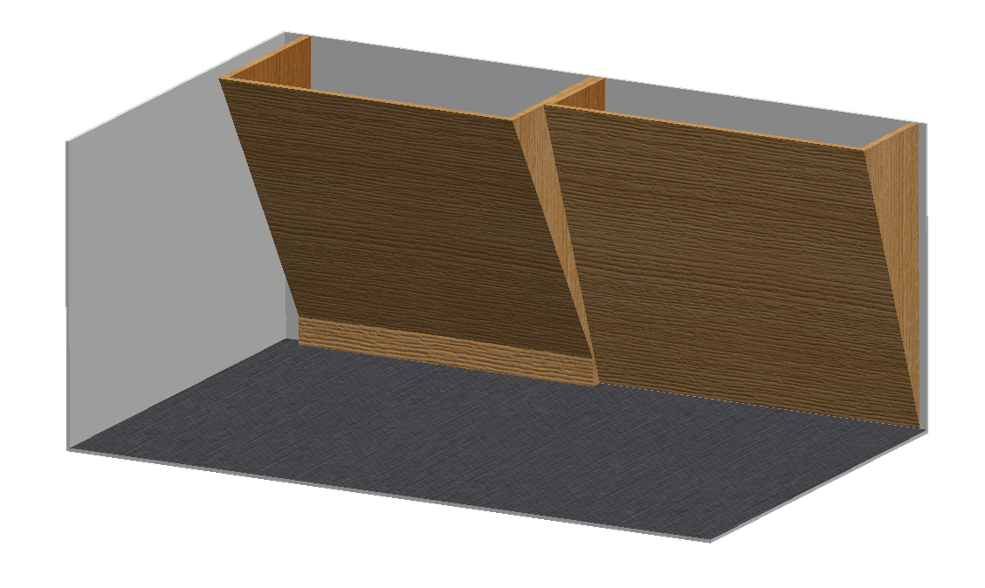
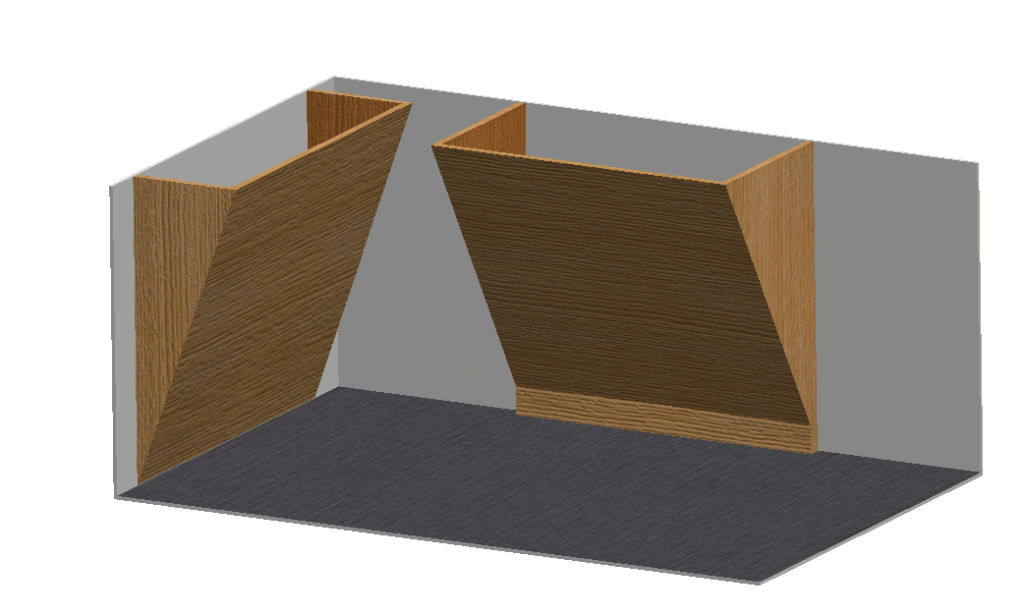
I played around with which walls I would attach them to. I finally decided that the two walls could be joined by an angled corner. This allows for a climber to traverse from one end of the wall to the other.

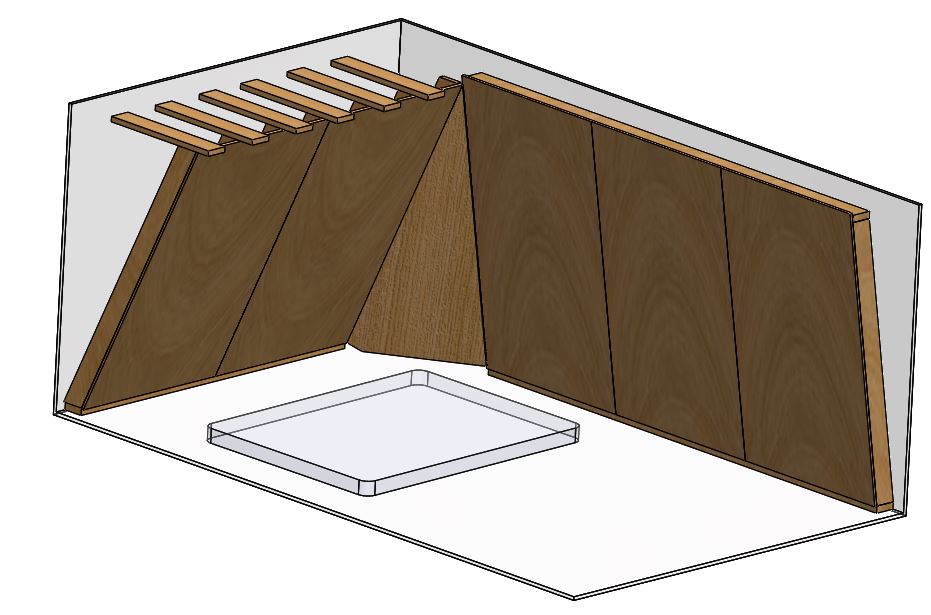
Once I decided what the space would look like from the climber’s perspective, I needed to understand how I was actually going to build it from the engineering perspective. I took into account the weight of the material, the weight of the climbers, the dynamic forces the wall needed to endure while the climber was actually using the wall, and the support structures already in the basement. I mapped out where the new support structures needed to be and got a general idea of how I would approach the build and purchase the materials. With this design in hand, I was ready to go!
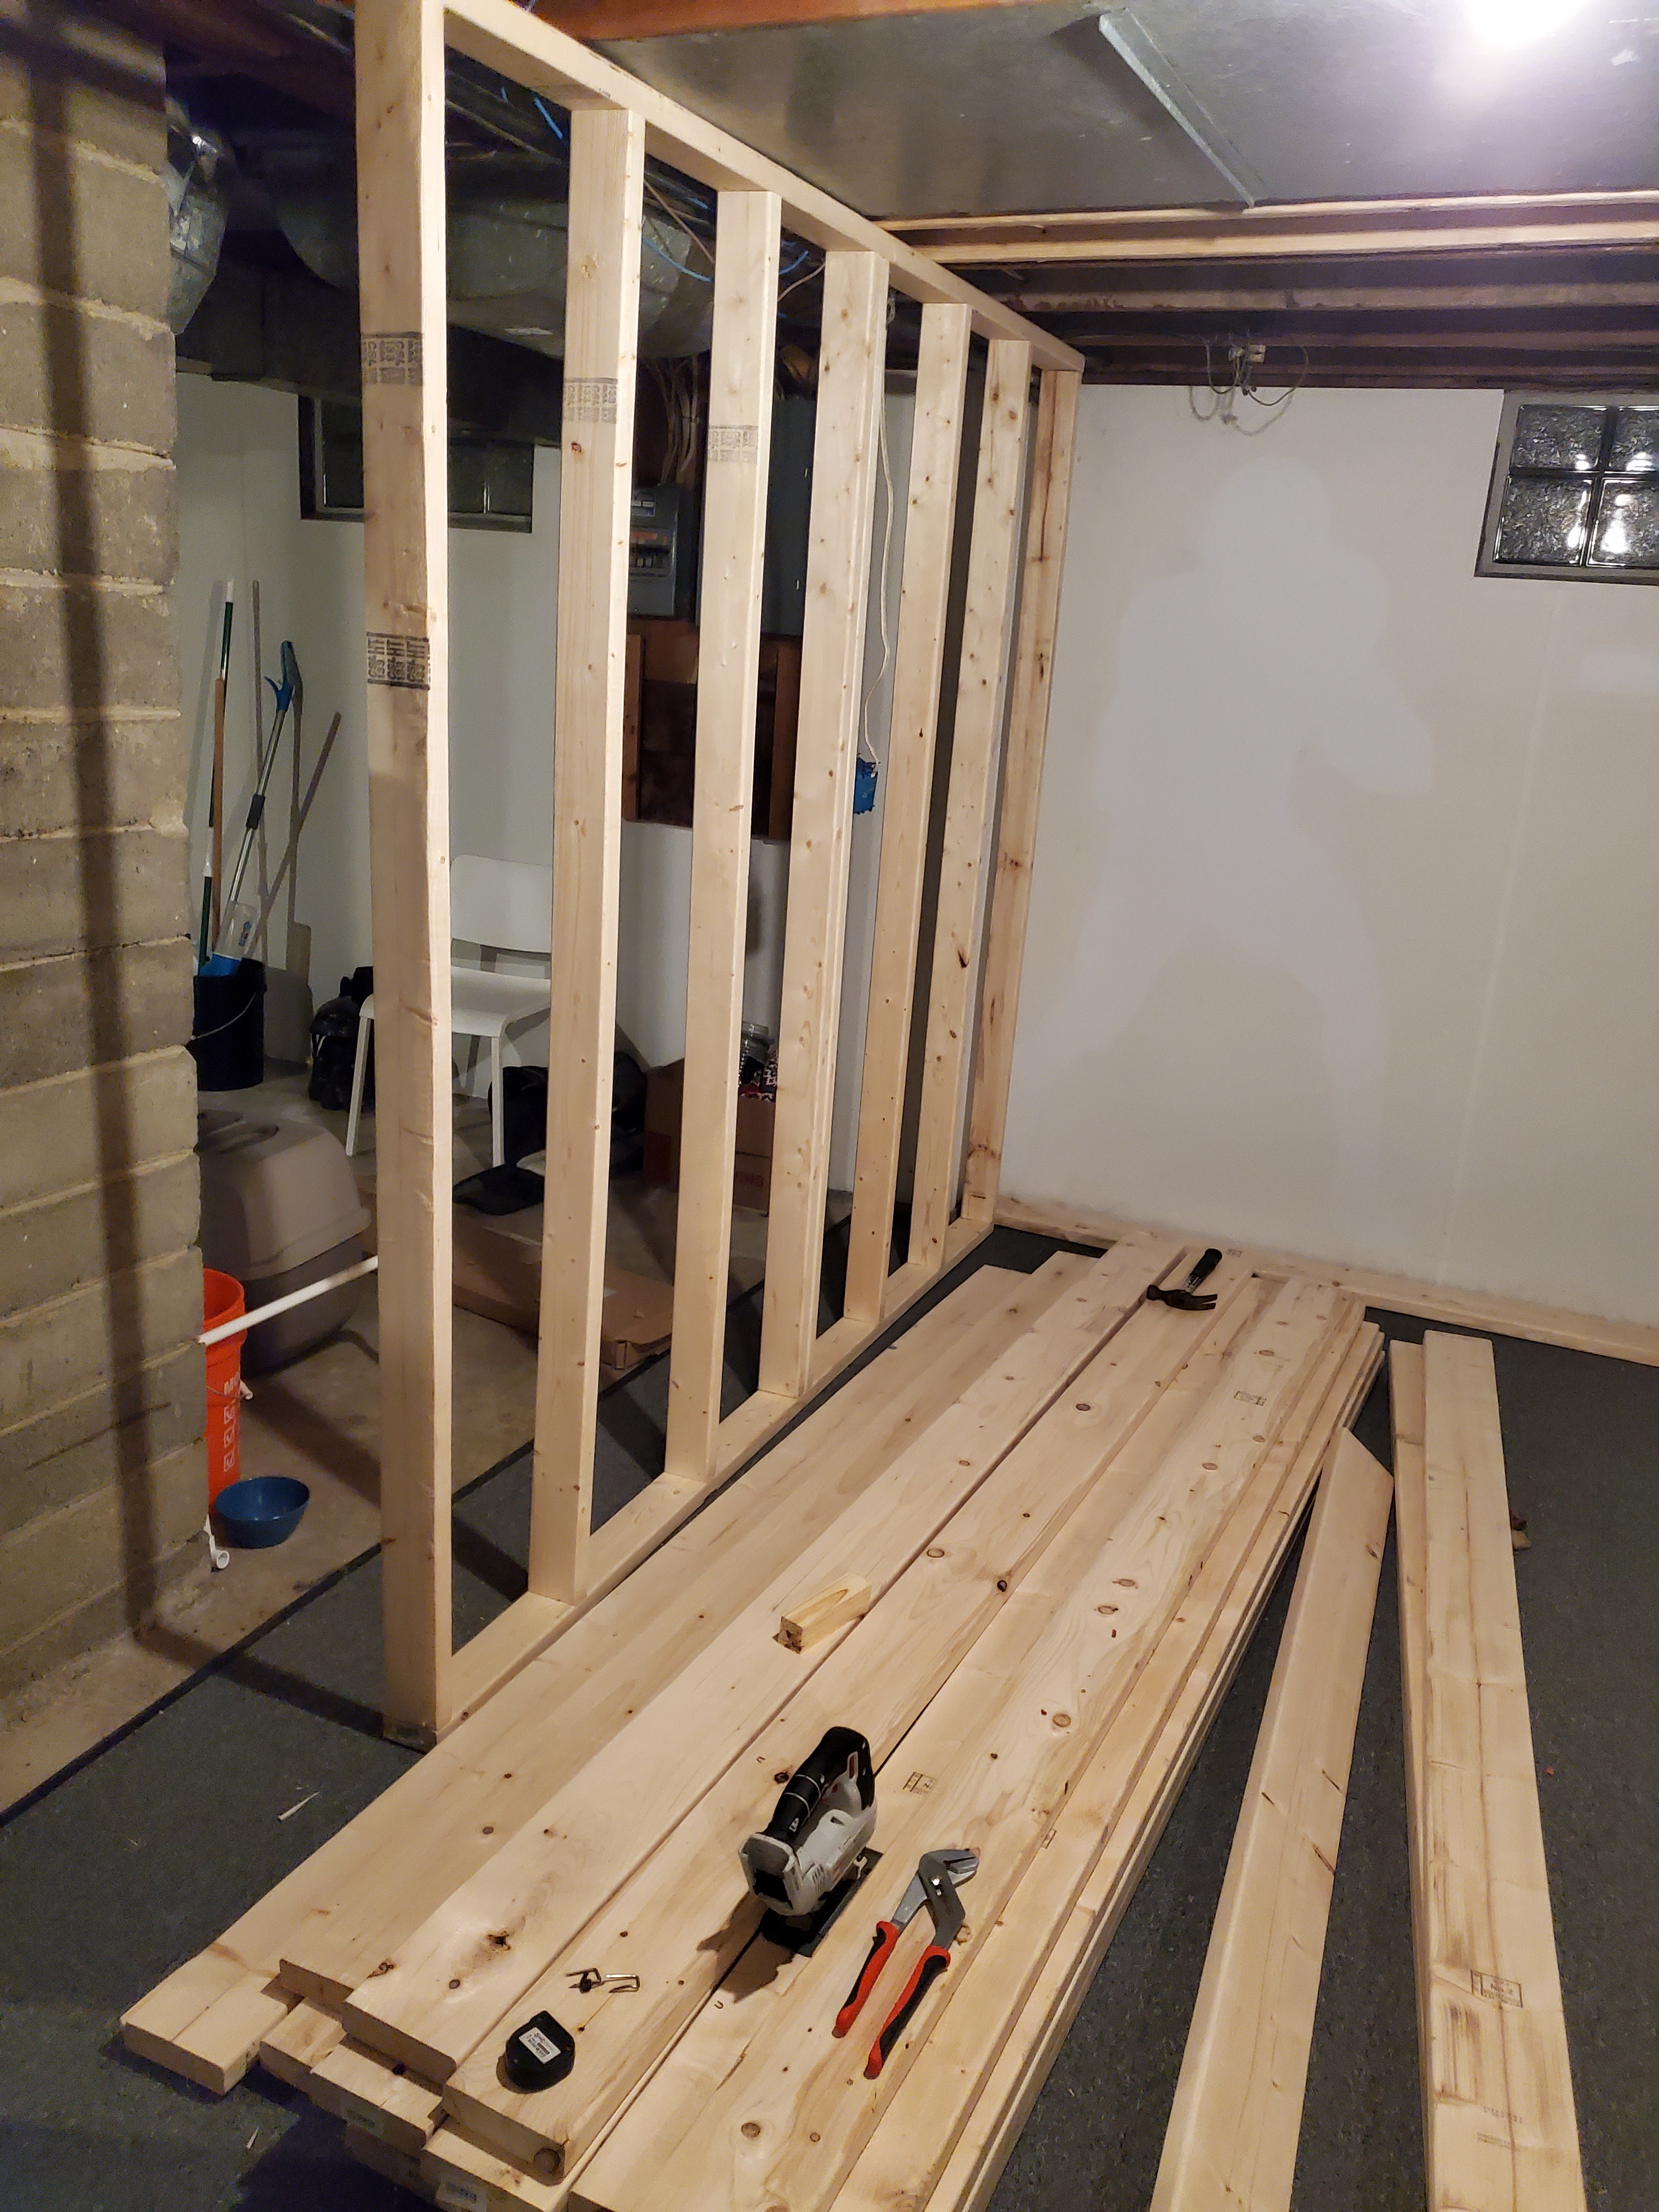
The Build
HOWEVER…. once you start a house project it always turns out to be bigger than you planned. With the peer pressure from some fellow climbers, there was a third vertical wall going up before I knew it. (Oh well, more climbing for me.) With some extra hands, the support structures flew up and I had to make some project decisions along the way. This included moving an electrical outlet, adding and rewiring a light so that it wasn’t in the way, adding a support beam in the ceiling so that the load wasn’t on the (kind of) old wood that was already busy supporting my living room above, deciding the best method to use for the t-nuts for the holds (I went with a diagonal pattern to maximize hold placement diversity), learning how concrete screws worked so that some of the supports could be attached to the floor (this particular skill came in handy for a fence project for my mom later on), and many more. Once the build logistics seemed to be settled, I began thinking about how I wanted to paint them.
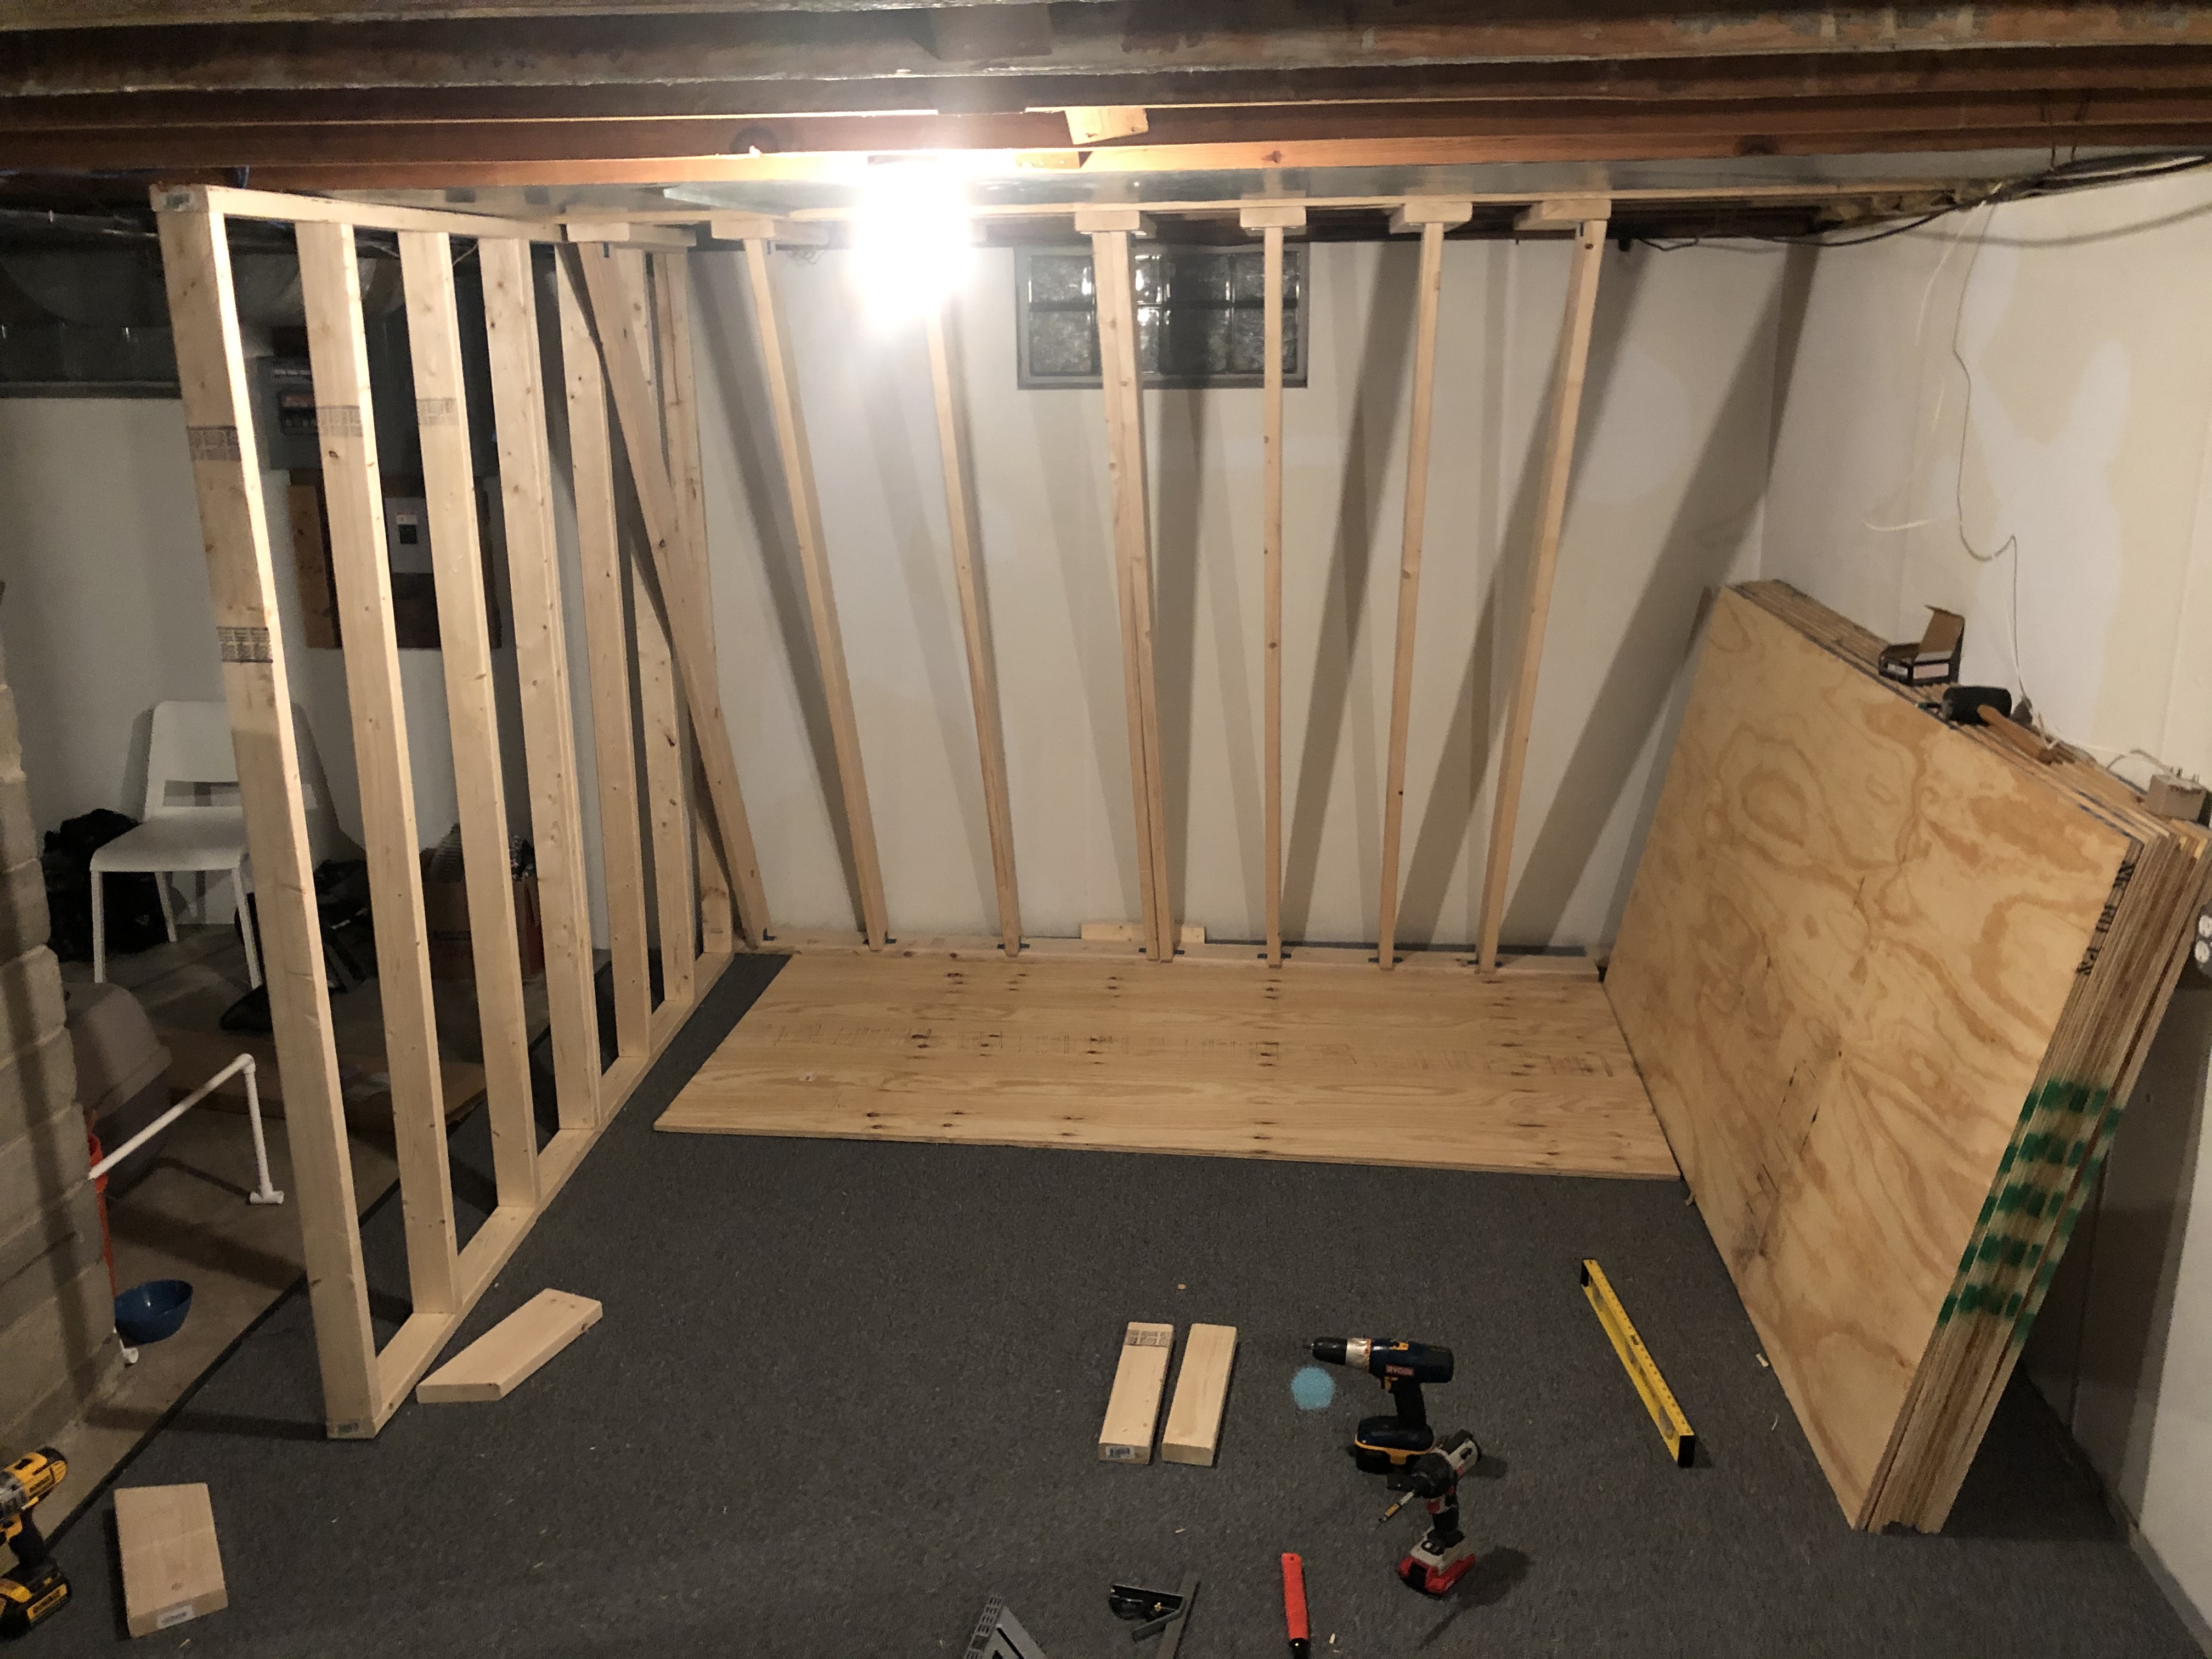
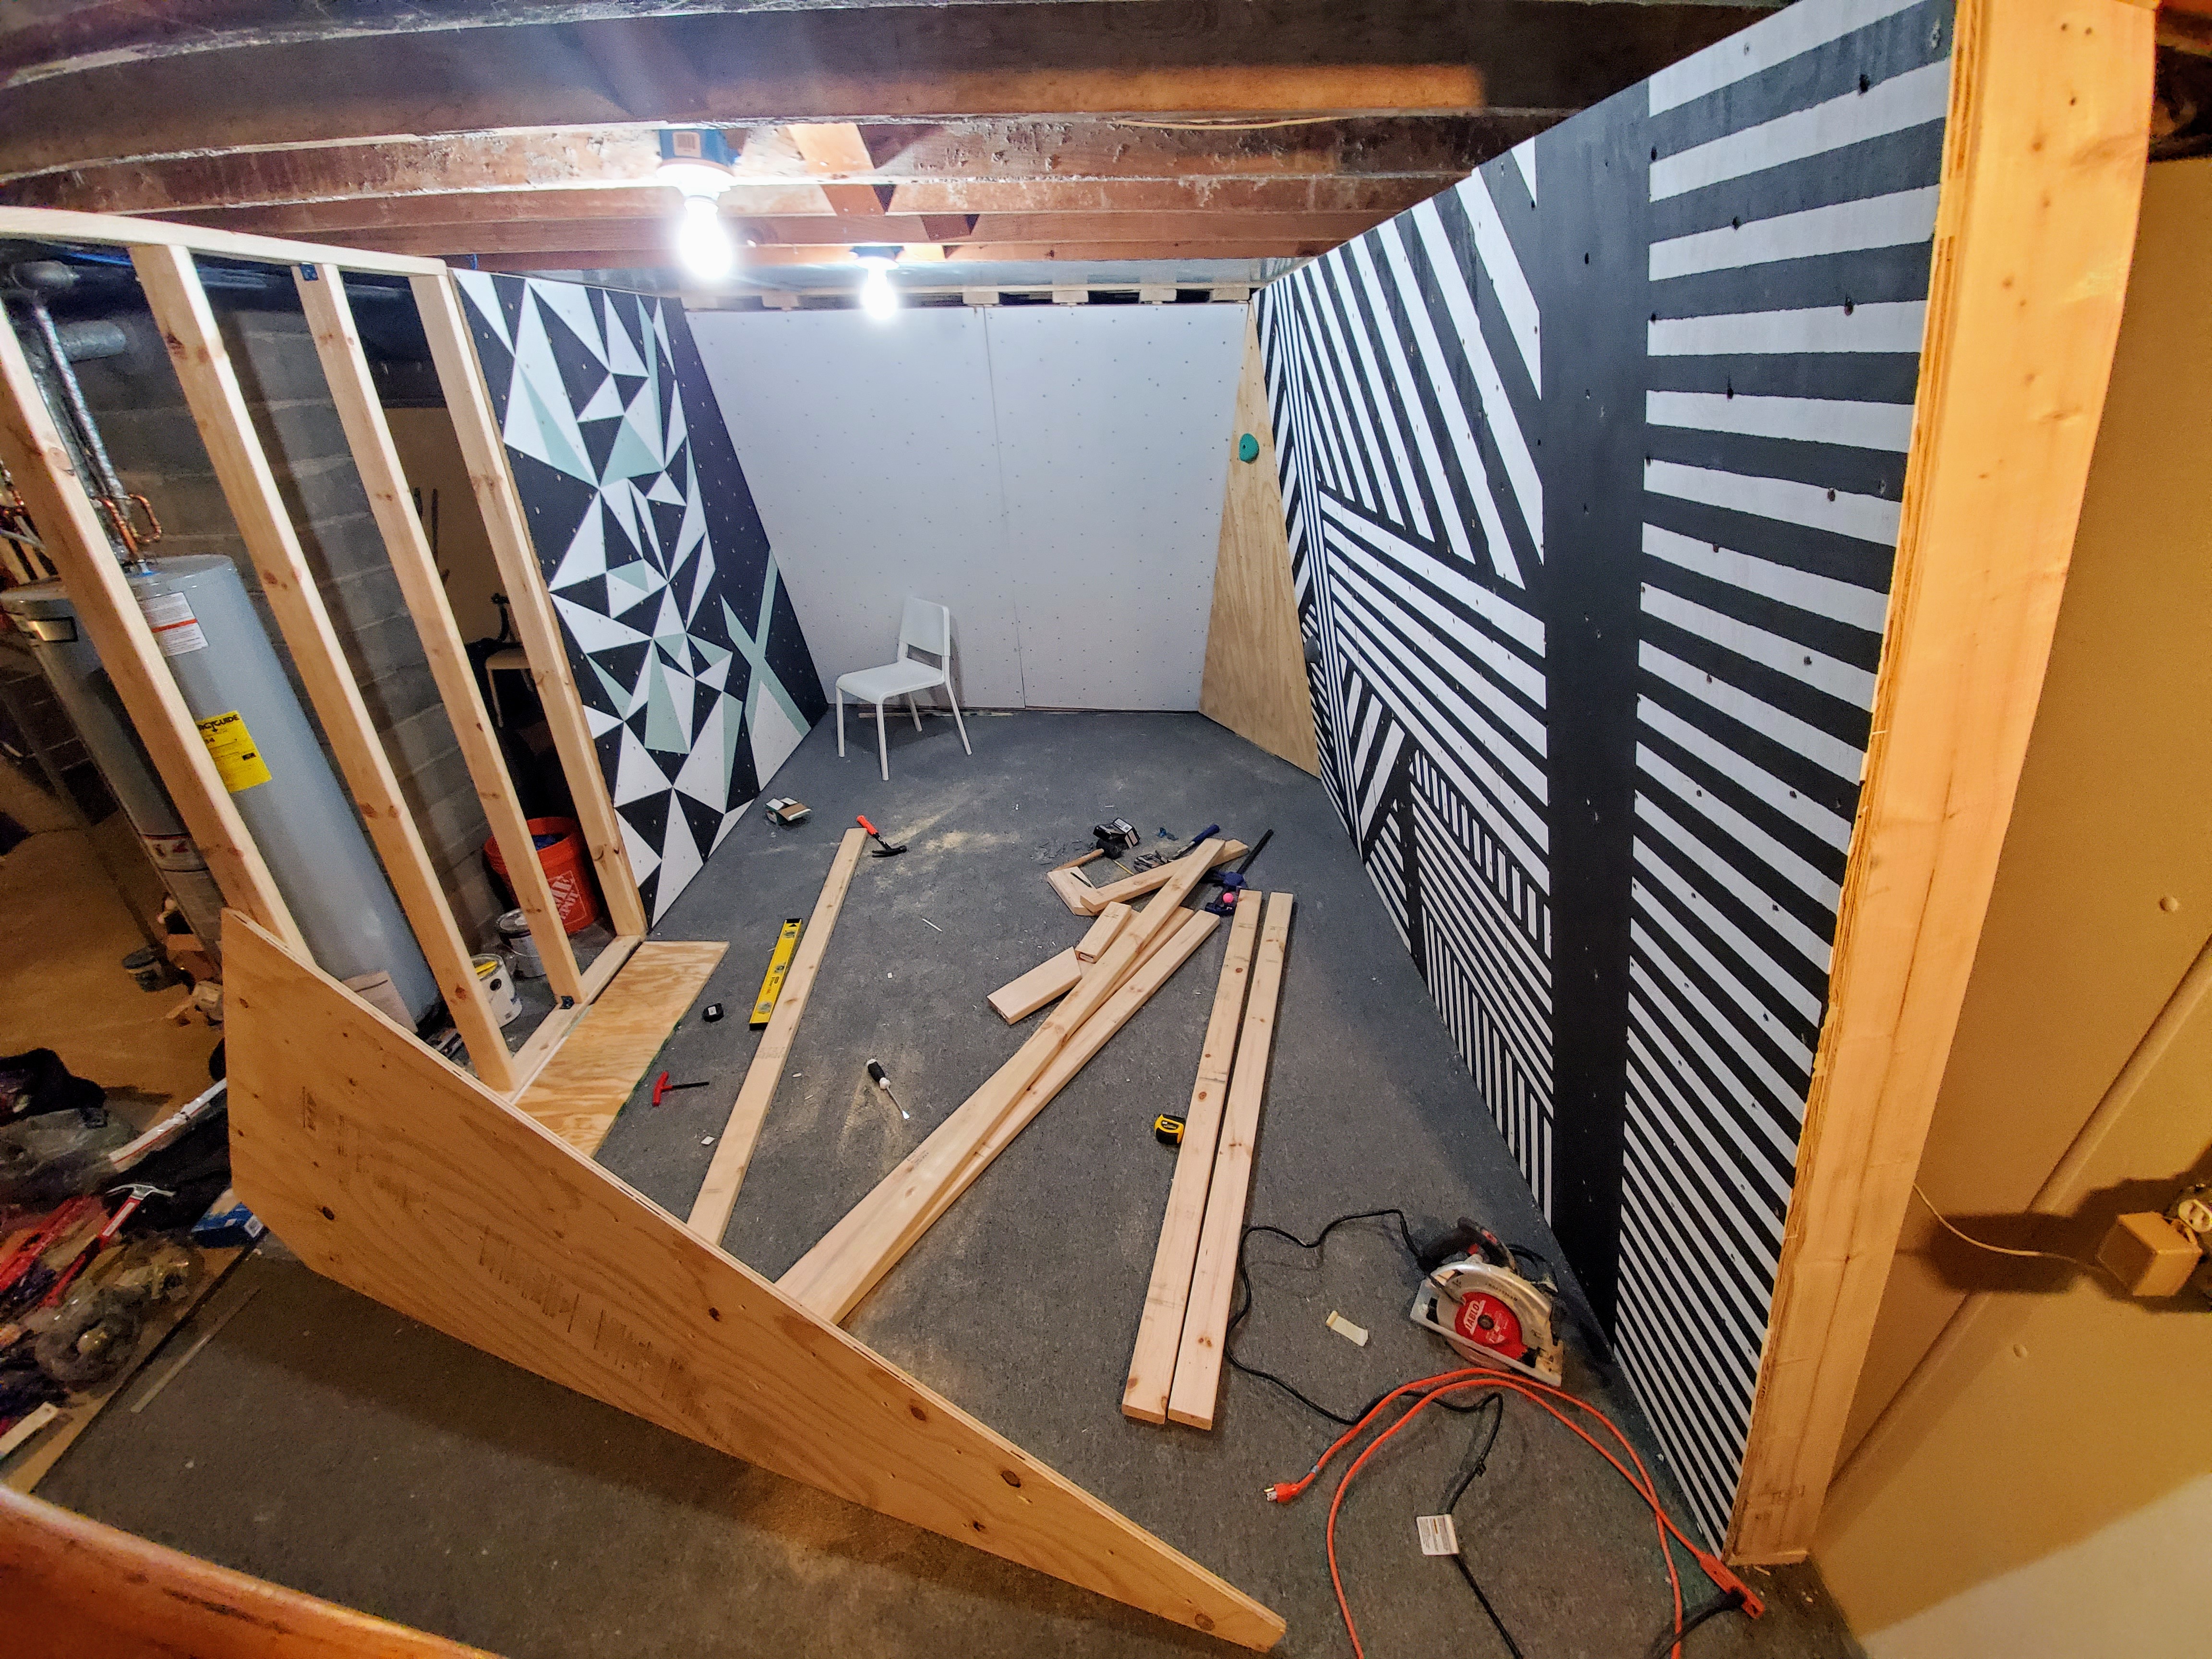
Once the panels went up I needed to test that the walls were strong enough to hold me… obviously. Through a couple of iterations, I finalized a design for the paint. With some help from some generous friends, we finished the paint and started mapping out some routes.

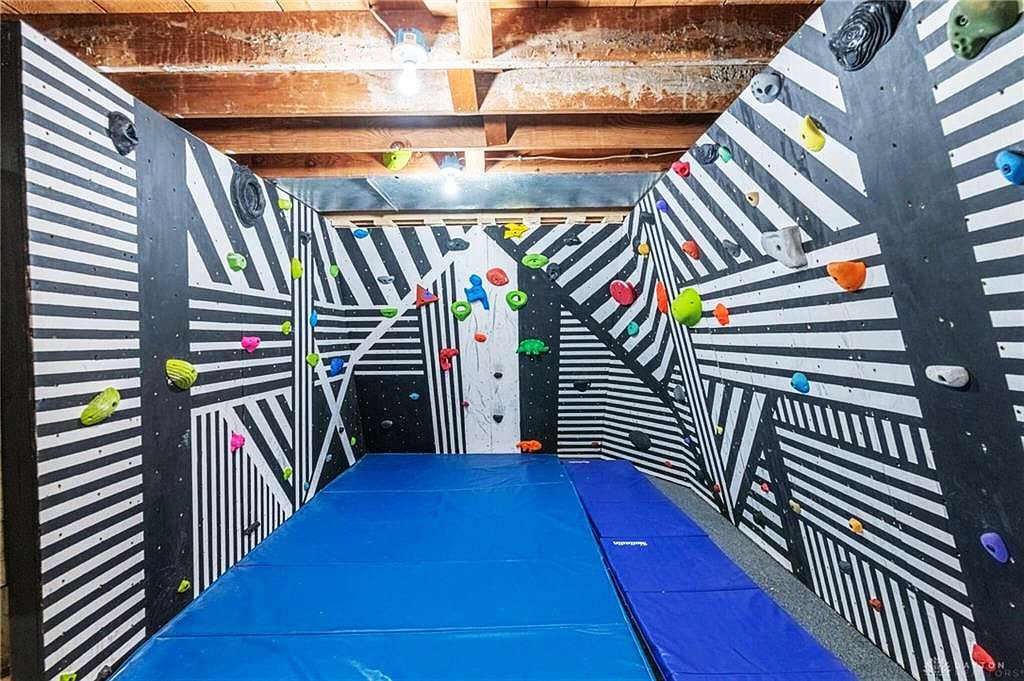
The Results
Because I wasn’t interested in getting hurt, I did some research on how climbing crash pads are made. The typical pattern was 1″ low density foam — 2″ high density foam — 1″ low density foam. I had to get creative on how I was going to achieve that on a budget. I was able to find some used gymnastic training pads and then I bought some memory foam mattress toppers that met the criteria. (It turns out mattress toppers are much more cost effective than sheets of high density foam).
Overall, I am pretty pleased with the results. I have since moved to an entirely different state. The new owners loved this feature though and I couldn’t be happier that it ended up in good hands. It’s only a matter of time until I build another one in my new house.